The Cuby G4 full manual is digital to reduce the waste of paper and to be able to include more information. If you need help in any part of the process please contact us (ideally through the live chat).
0. CONTENT
Cuby G4
smart control for mini-split type
air conditioners.
Mounting accessory:
to mount/place the Cuby on a wall
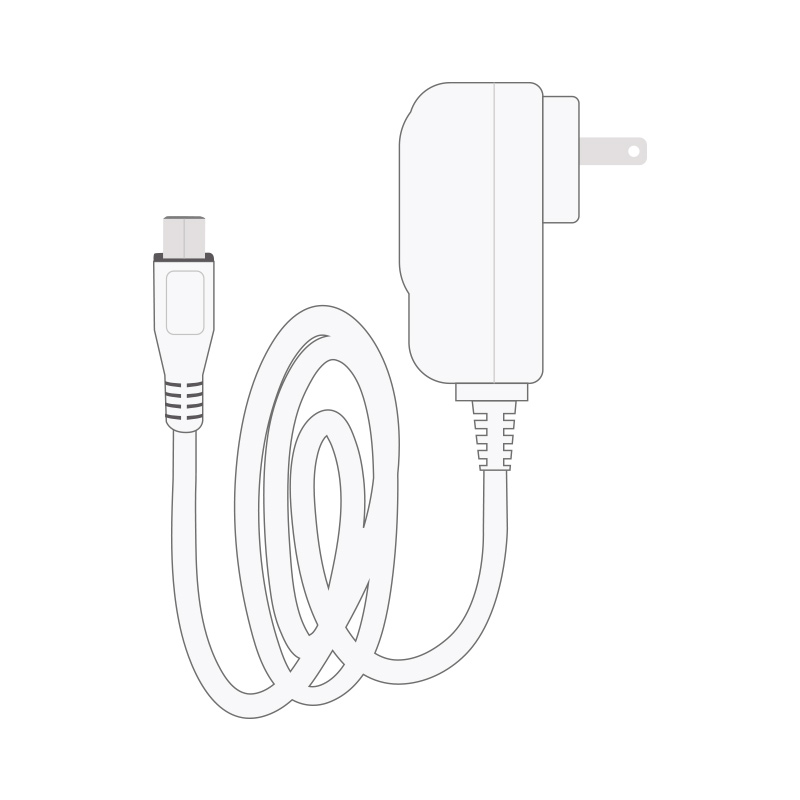
Voltage adapter:
Micro USB connector with 5VDC output and input that supports 90 VAC to 250 VAC (50/60 Hz).
1. DOWNLOAD THE APP
App Android

App iOS

*For iPad you have to select the option in the App Store that says “Only for iPhone”
2. REGISTER
- Open the Cuby Smart App.
- If you do not have a user account, create a new one using your email.
- Login with your user name (e-mail) and password.
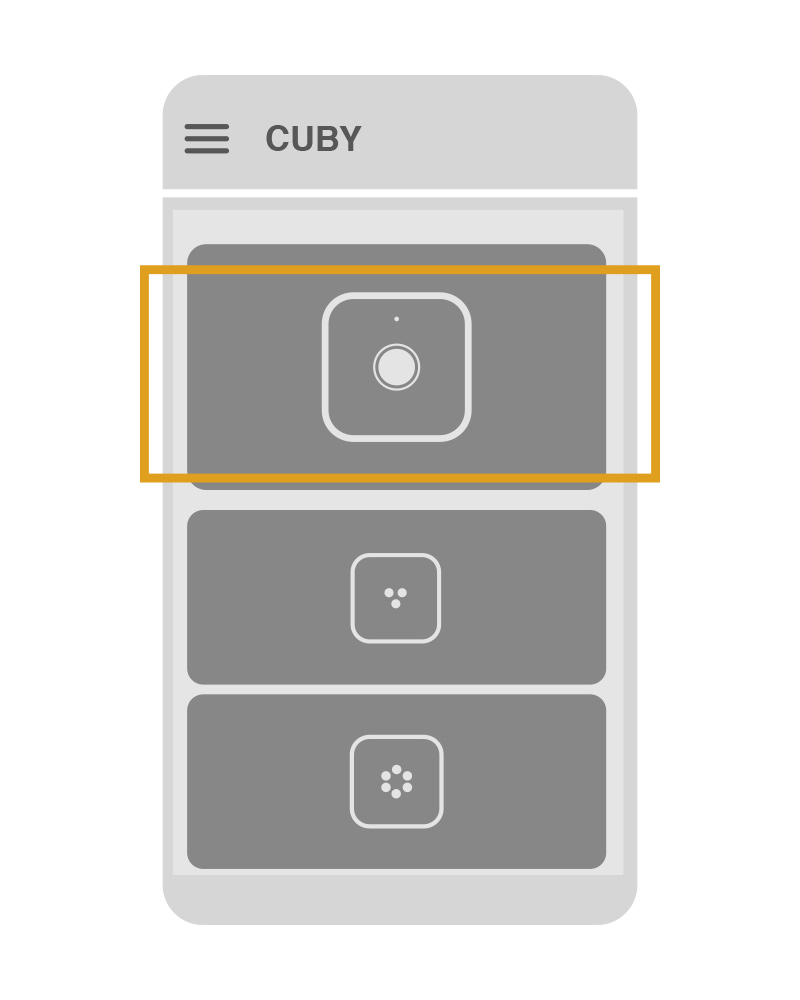
3. ADD YOUR CUBY G4
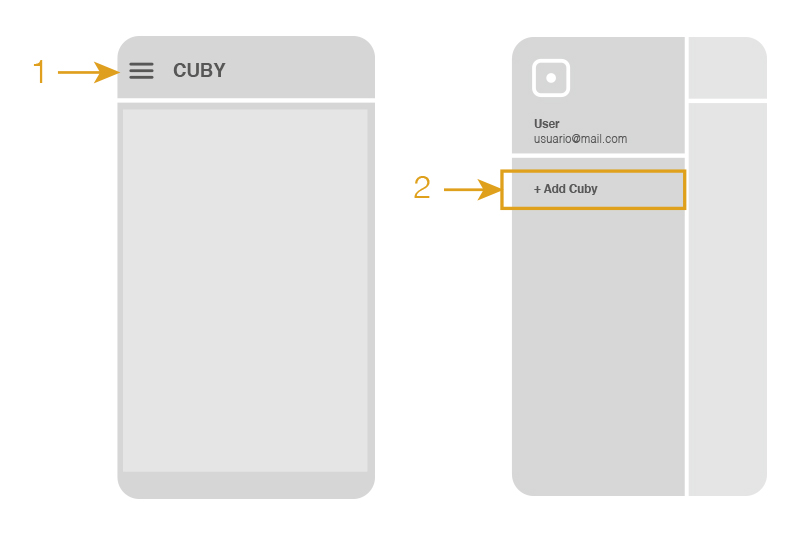
- Within the Cuby app, click on the menu at the top left and select the “+ Add Cuby” option.
- Select Cuby G4 and follow the instructions.
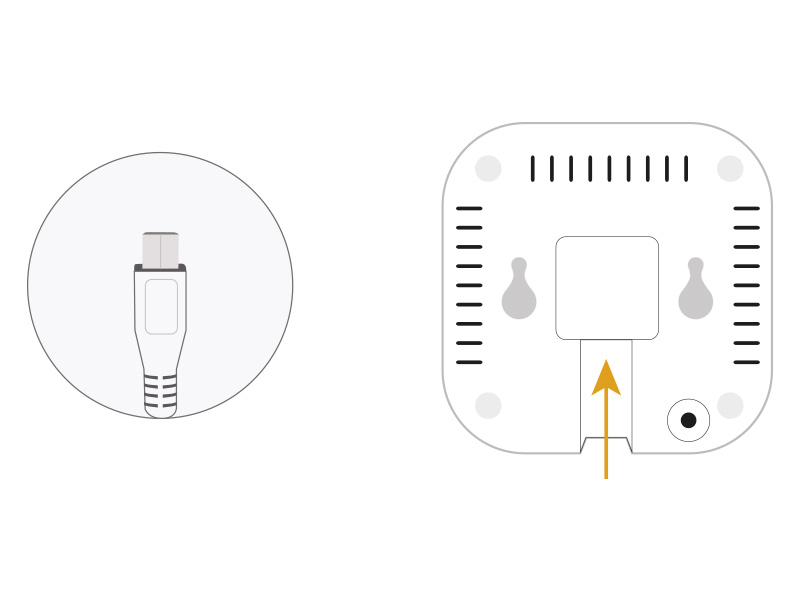
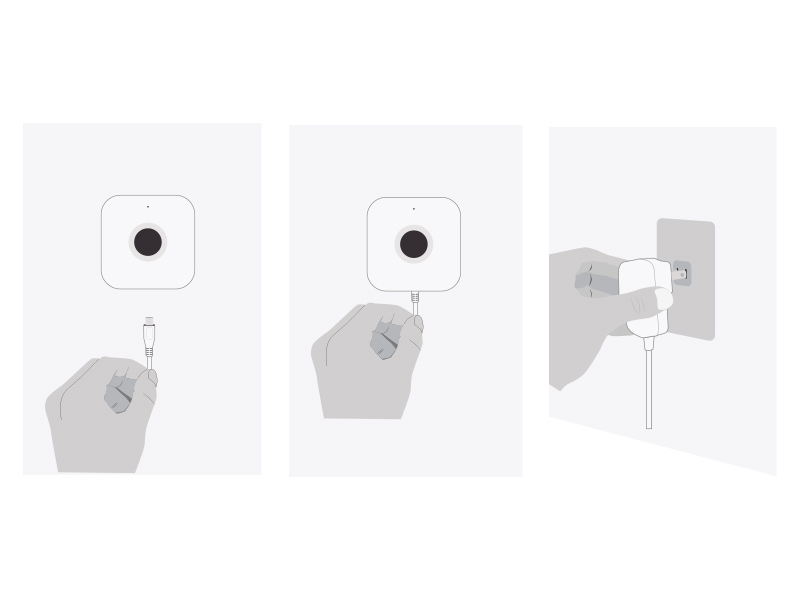
- Connect the voltage adapter to the electrical network and the micro USB end to the Cuby.
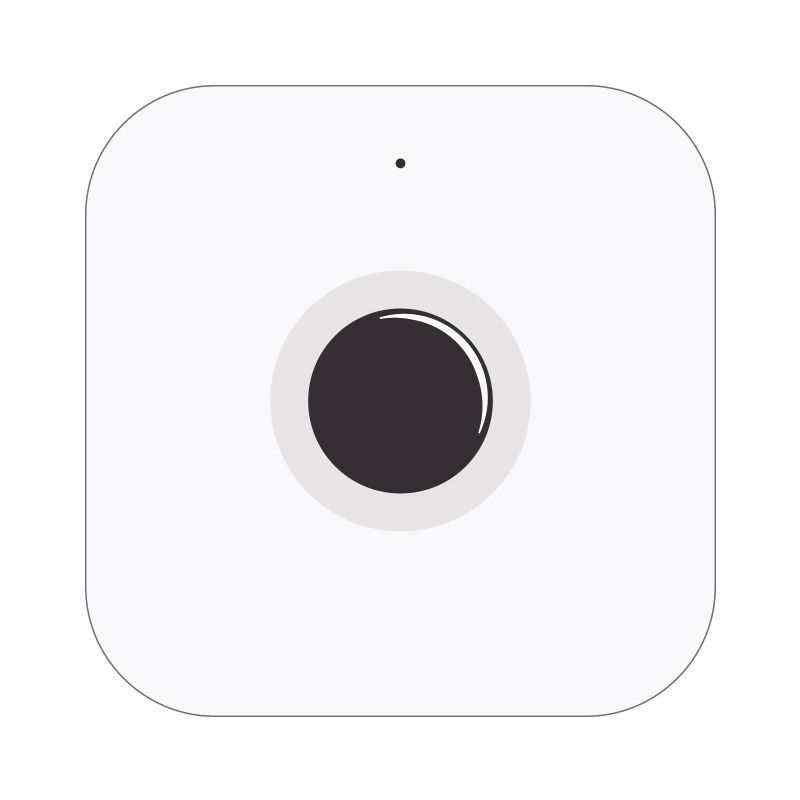
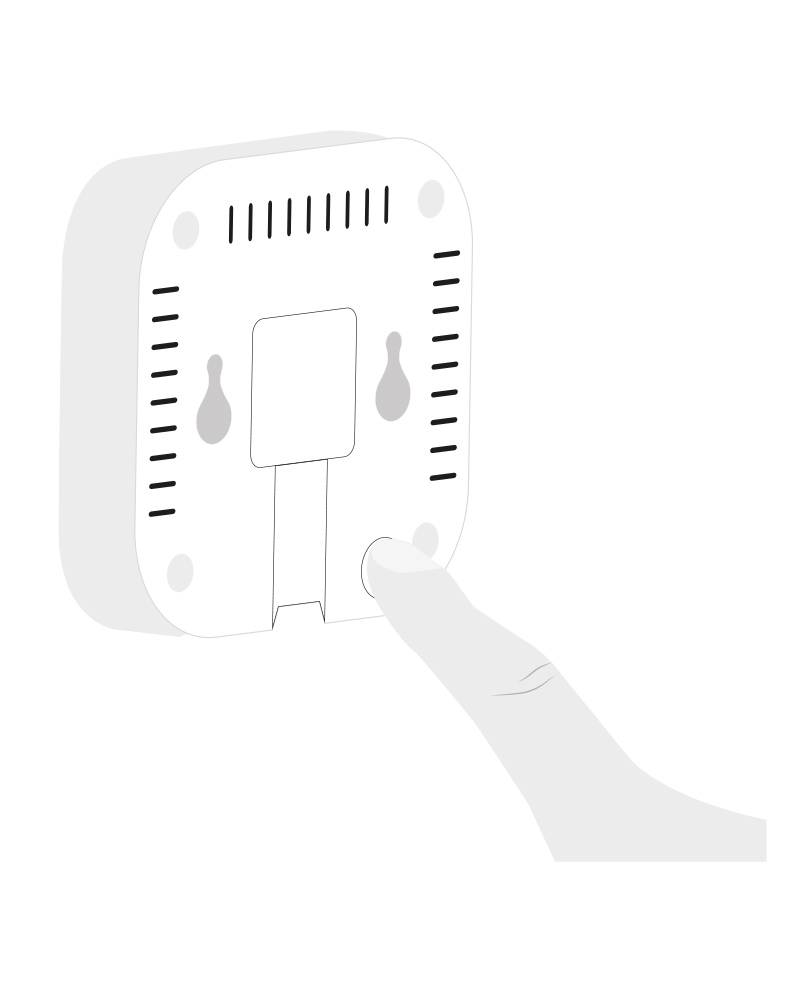
- Look at the LED indicator on your Cuby
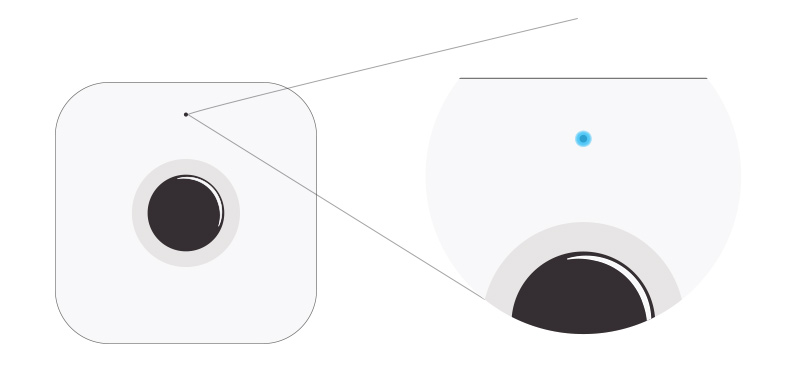
- If your Cuby’s LED indicator is not lit blue, press the button on the back of Cuby for at least 4 seconds, until the LED indicator turns blue.
- Follow the steps in the App and wait for the App to find your Cuby. You should not spend more than 1 minute looking for it.
In case the App does not find the Cuby, make sure you have the Bluetooth and location activated on your phone.
If after several attemps you still can’t find the Cuby, restart your smartphone and try again. - Once your cell phone detects Cuby, it will ask you to name it. Write a name that identifies where Cuby will be installed.
- Do not use the following words for the name as they may cause problems when using virtual assistants like Alexa and Google Home:
1. “Air”
2. “Air Conditioning”
3. “Weather”
The words Air and Air Conditioning make assistants think that you are asking for cooling mode or air conditioning mode and it will not execute the command correctly. - Wait for Cuby to show you the available networks. It may take up to 30 seconds to display the list of networks.
- Select your WiFi network from the list that will appear, remember that you can also access it manually by typing the name and password.
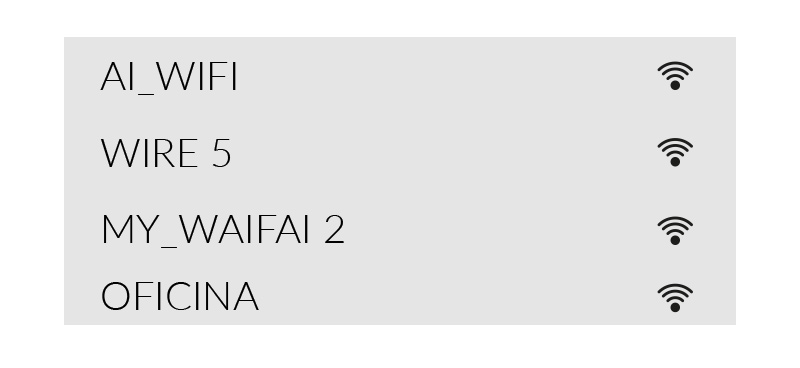
- Once you have selected the network you want your Cuby to connect to, type the password and press Next.
- Wait while your Cuby connects to the Wi-Fi network. This step should not take more than 1 minute.

- Done, you have successfully added your Cuby, you can check it by looking at the green LED indicator. When the Cuby is connected it will temporarily turn green and then the visual indicator will turn off to avoid disturbing you at night.

- The next step is to set up the infrared protocol for Cuby to control the air conditioner.
4. CONFIGURE IR SIGNAL
- Make sure your air conditioner is off.
- Take the Cuby and point the infrared transmitter at your air conditioner, less than 3 meters of distance.
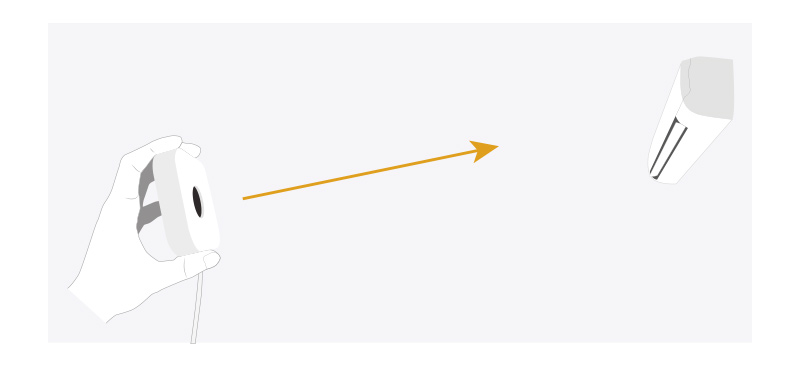
- Cuby will test different protocols by sending one infrared signal at a time. During the process, you will be asked if the Air turned on or made a Beep, touch “yes” or “no” as the case may be.
- Once the air beeps or turns on, press “YES” for the App to show the extended control. Try some of the functions that will be displayed in the App. Then tap on “Works” if the A/C seems to be operating correctly. If the temperature is not correct (it has a degree difference) you can press the option that says “Does not work” to try other protocols.

- Your Cuby should now be functional and you will be able to control the A/C as normal.
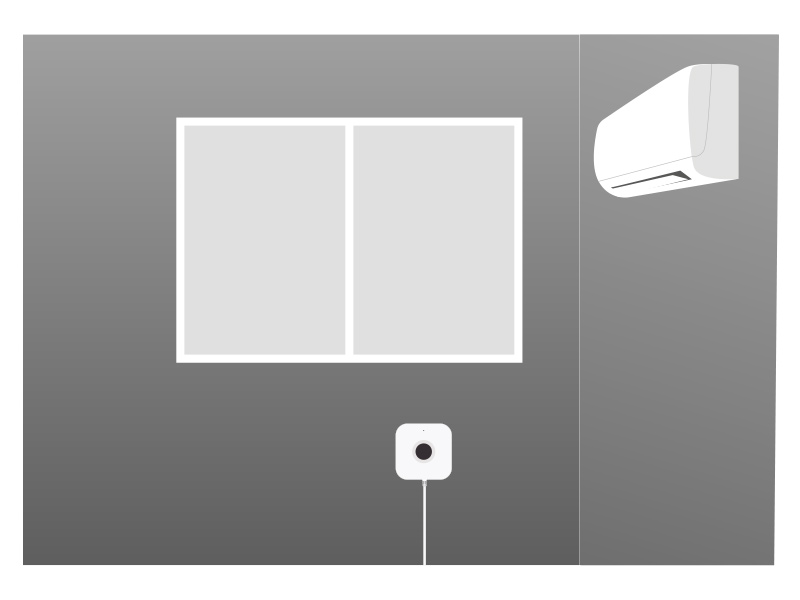
5. LOCATION AND MOUNTING
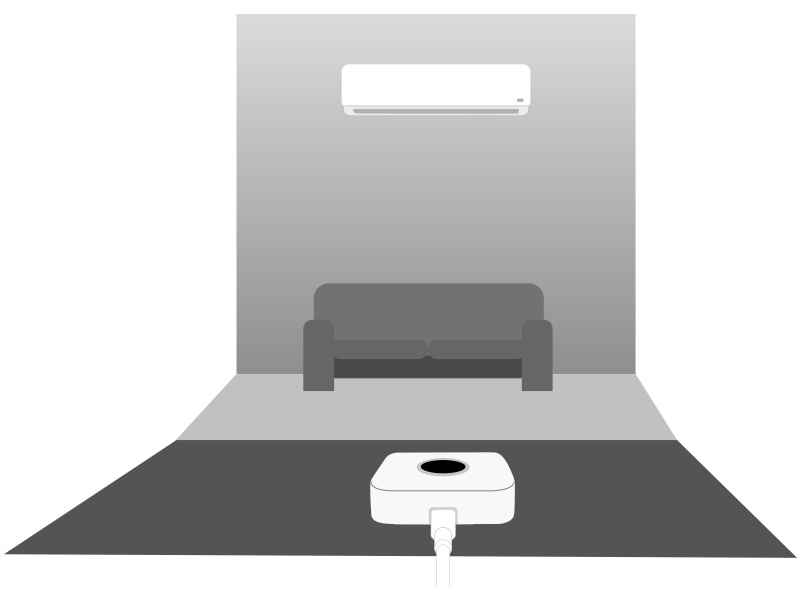
The placement of the Cuby is very important since a bad placement can lead to loss of commands. The Cuby uses the ceiling and walls to bounce the infrared signal to control the A/C. The infrared power is higher than a traditional remote control, however, it is important to find the ideal placement.
Surface placement
The simplest way to install the Cuby is to place it on a piece of furniture or any surface within the same room as the Air Conditioner (in line of sight).
Wall mount
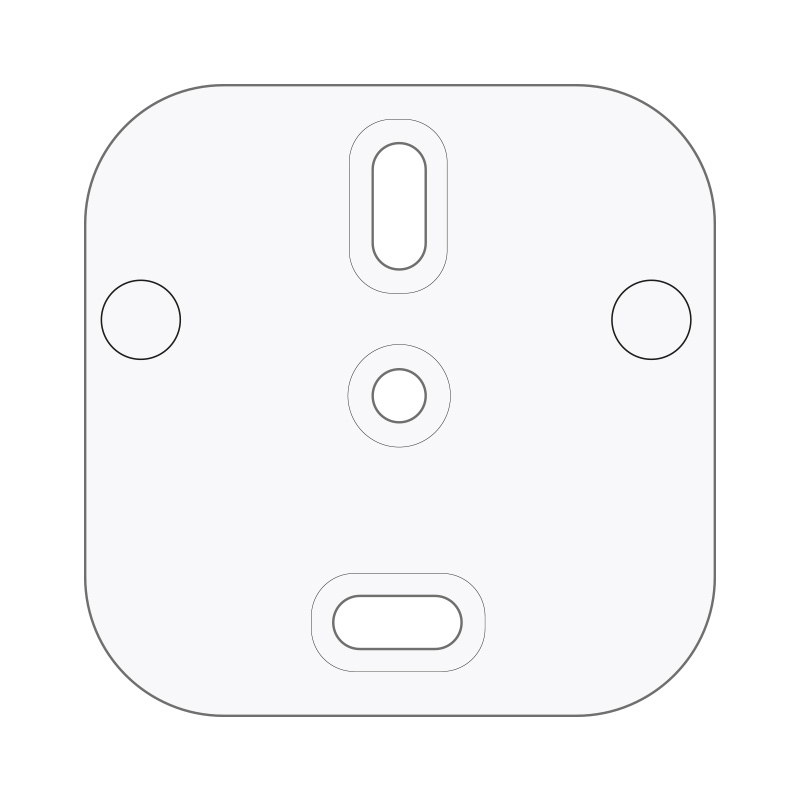
Another way to install the Cuby is to fix it to a wall using the included mounting accessory. The mounting accessory can be glued with adhesive (No More Nails or similar) or it can also be screwed with 1 or 2 screws.
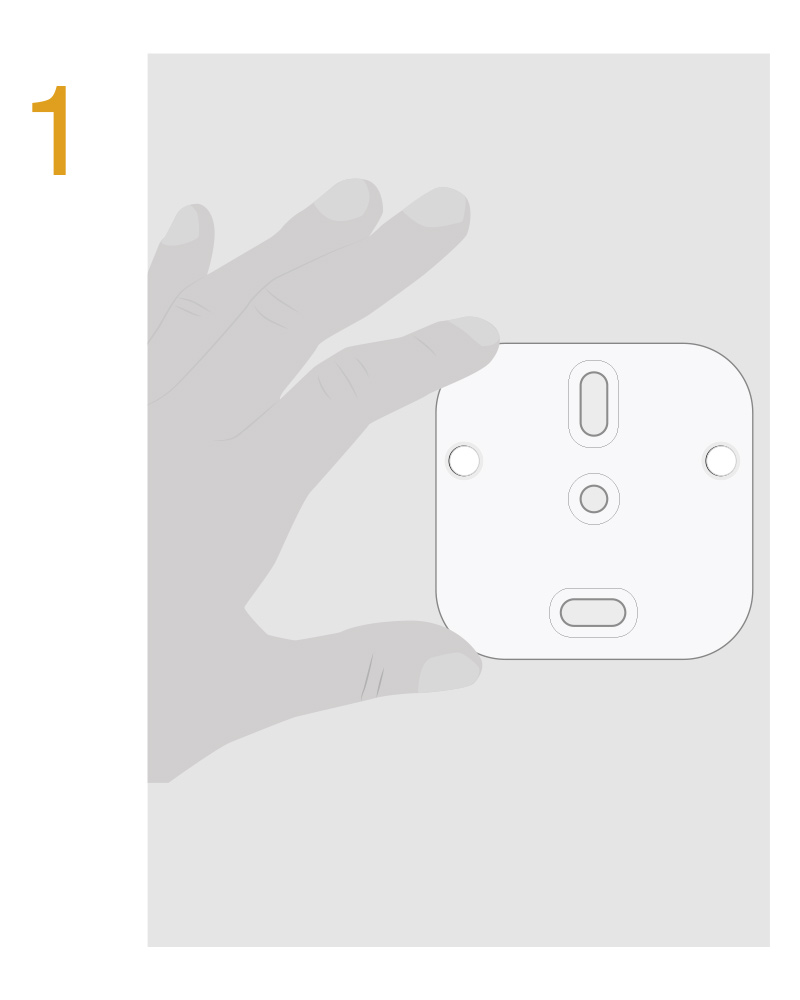
Use the mounting accessory to mark the spot to be drilled.
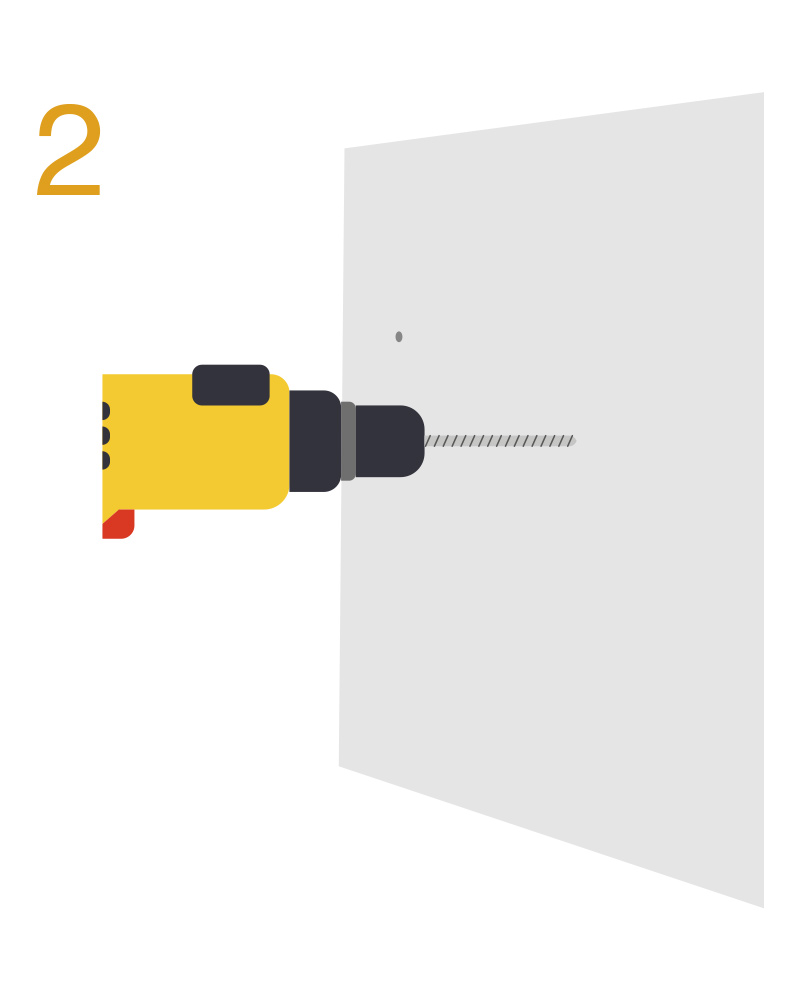
Drill and place the dowels
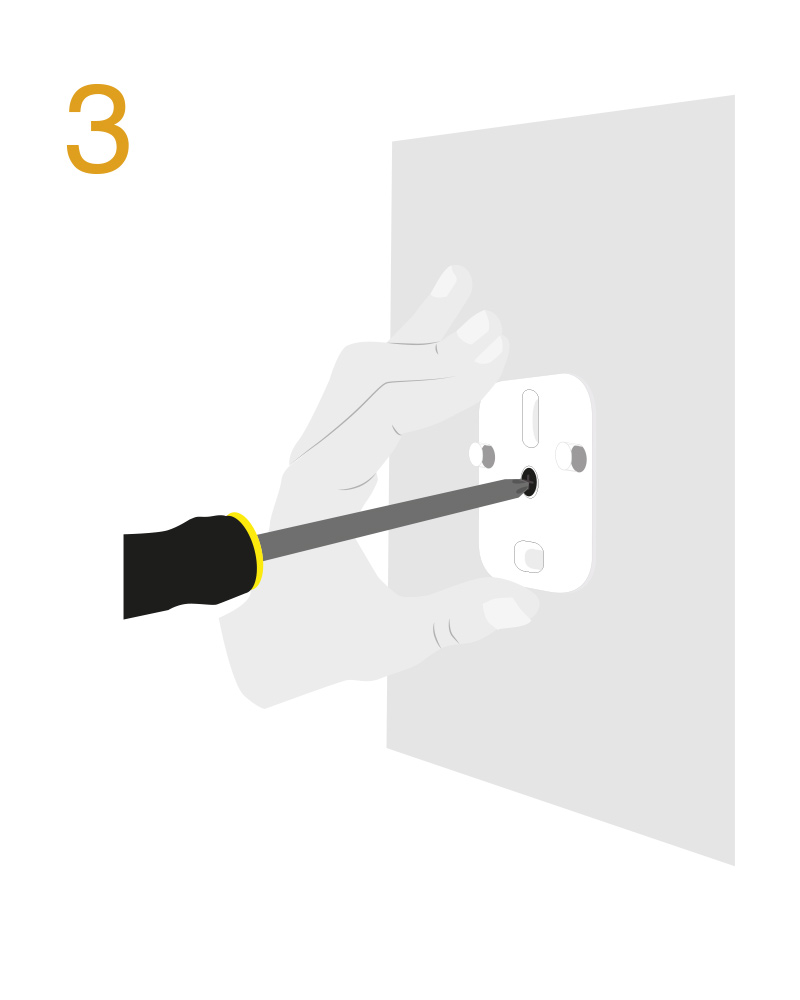
Screw the mounting accessory to the wall
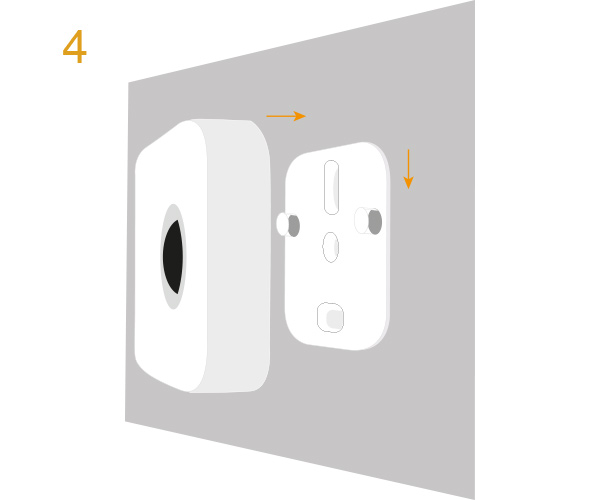
Place the Cuby on the mounting accessory. Some force is required to make it click.
Add Cuby G4 – Alternative without app
- Make sure the Cuby is connected to the electric power.
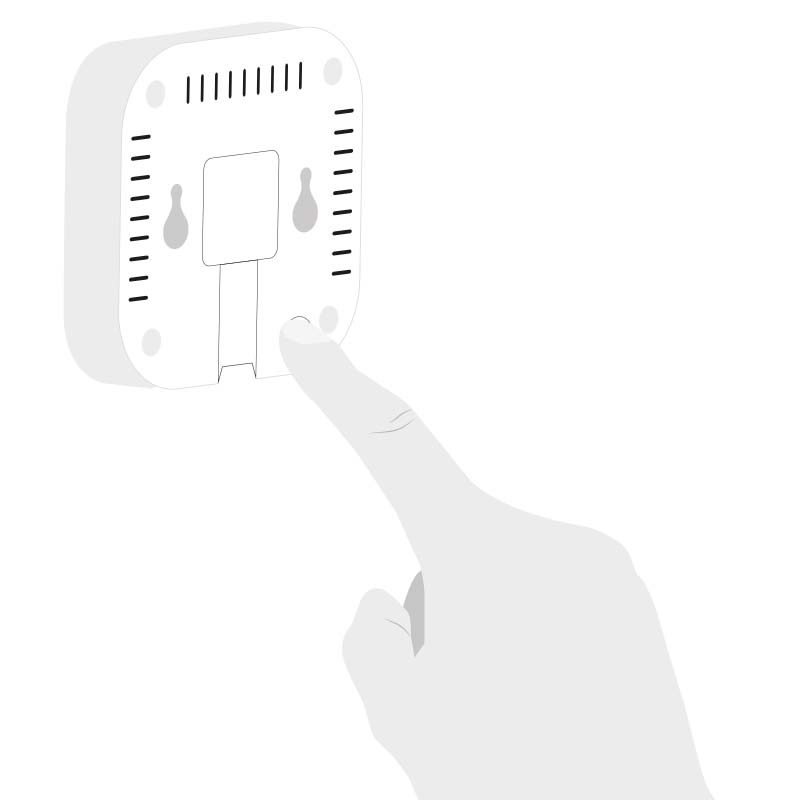
- Hold down the button on the back of the Cuby for approximately 8 seconds.
- On your phone, go to the Wi-Fi network settings and connect to the network generated by Cuby, it will be named “Cuby_XXXXX”
*If you see a pop-up window with a message “Internet not available” or “no connection” click on the option “Stay connected” or “keep connected” as the case may be.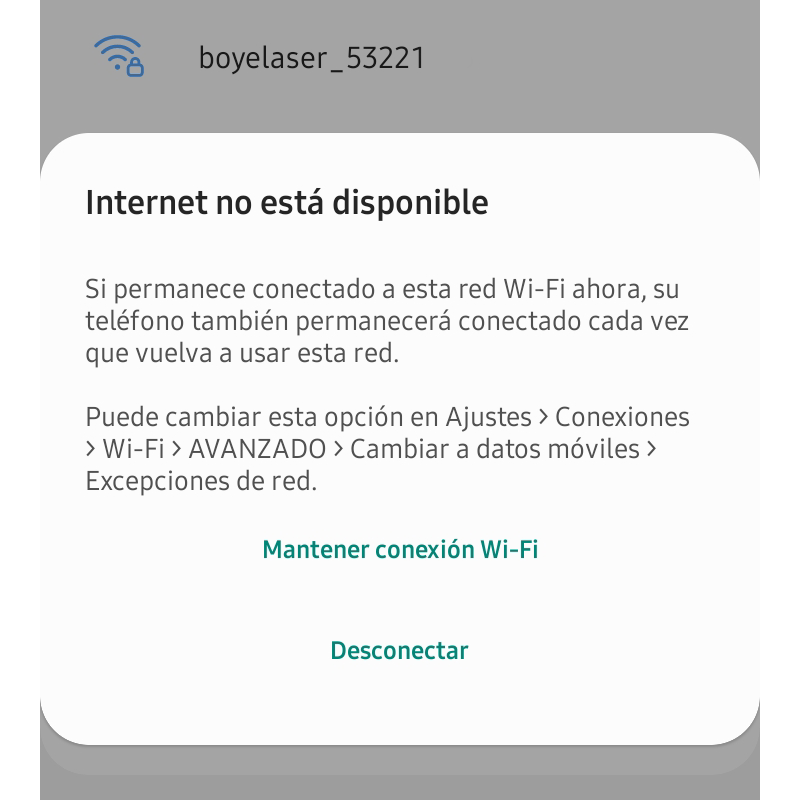
- Open a browser window on your phone and enter the following: 192.168.4.1
- Fill in the required information.
- Cuby Name: It is the name that will be shown in the app to identify the Cuby.
- Cuby Account: The email address you used to create the Cuby account. The Cuby will be added to this email, make sure you type it correctly.
- WiFi SSID: The name of the WiFi network, make sure you use the correct name, checking uppercase and lowercase letters.
- WiFi password: The password of the WiFi network.
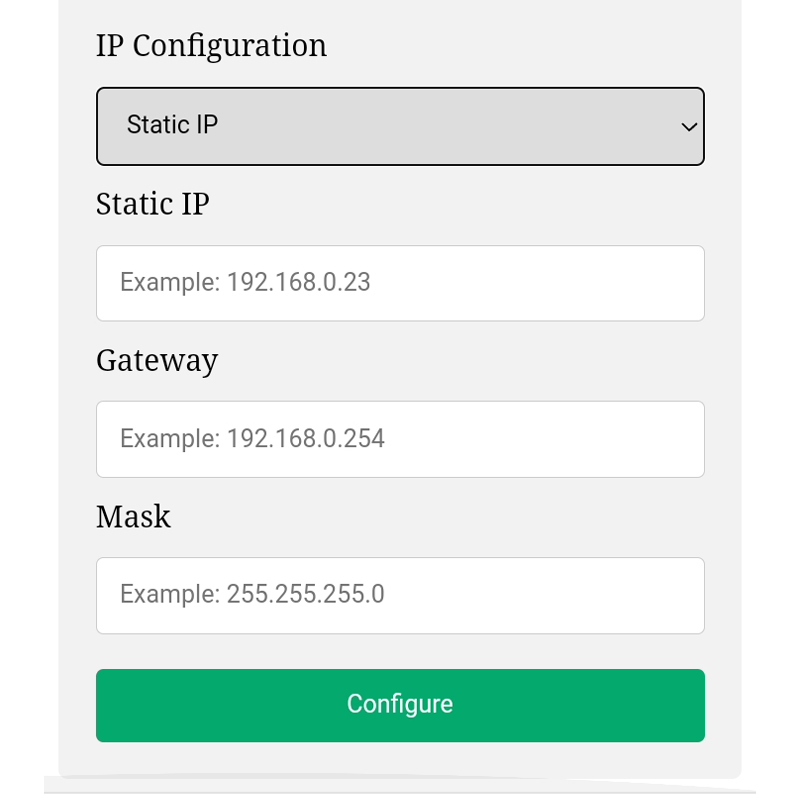
- IP Configuration: Do not modify unless you want to configure a static IP (fixed IP).
Static IP (fixed)
If you want a manual configuration with a fixed IP.
- In the IP Configuration option, select the “Static IP” option, it will show you the options to configure the fixed IP.